High frequency sound waves (frequency > 20000 HZ) also known as ultrasonic waves are introduced in a test object through a probe, these waves travel through the material on a predictable path. The waves are reflected at interfaces or other interruptions or discontinuity. The reflected waves are detected and then analysed for the possibility of any discontinuity in the test object.
Sound beam is emitted through a probe. The probe is made up of a piezoelectric material. Piezoelectric material has the ability of converting mechanical energy into electrical energy. It is reversible, hence an electrical energy can be converted into mechanical energy or sound energy. The probe receives electric signal from the Ultrasonic machine and converts it to sound beam, these sound beam travels into the test object and gets reflected at interfaces or discontinuity, the piezoelectric material (in probe) converts the reflected sound beam into electrical signal that can be displayed as visual signals on cathode ray tube (CRT) or liquid crystal display (LCD) screen of the machine. Three types of probes are generally used in industries;
- Normal Probe (Figure – 1)
- TR probe
- Angle Probe (Figure – 2)
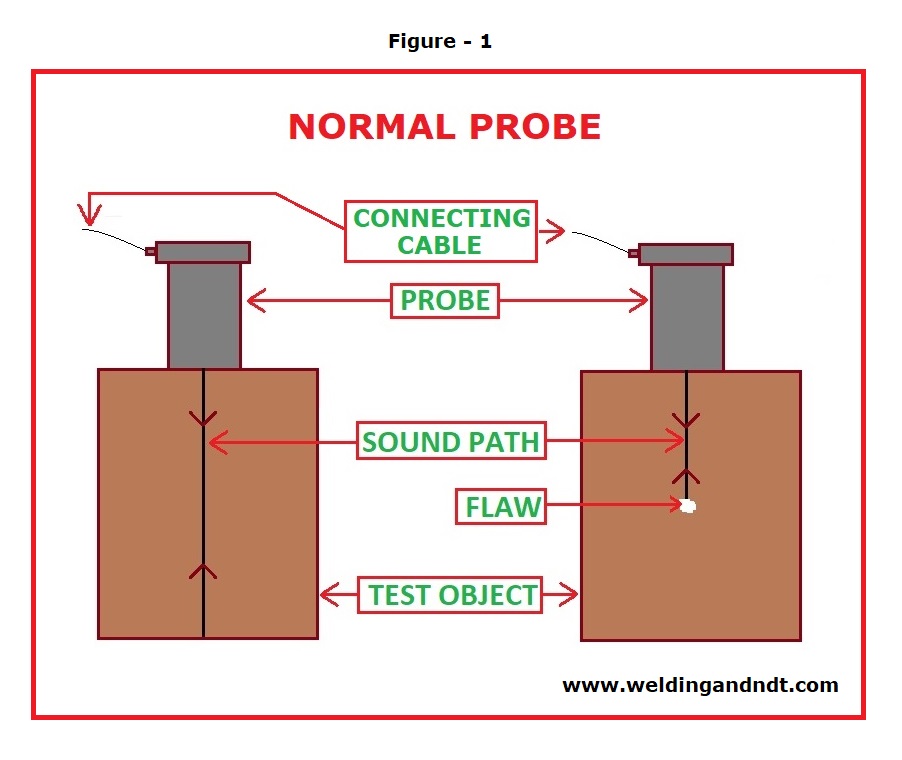
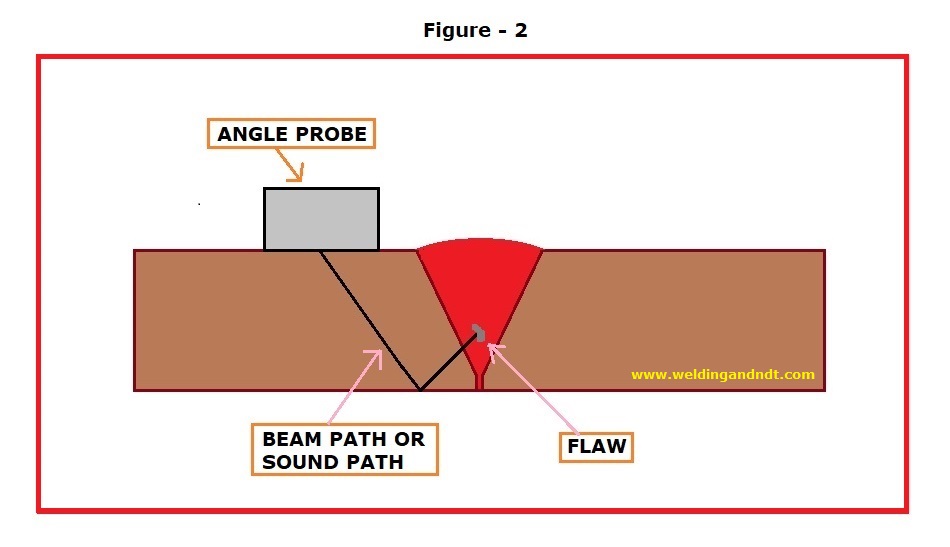
In TR probe, two separate crystals are used to transmit and receive the sound energy in the same housing, whereas in Normal and Angle probes same crystal transmits as well as receives the sound beam. The normal probe emits sound energy at right angle to the transducer whereas, the angle probe can emit sound energy at an angle. Three types of angle probes are very popular among the industries, these are
- 450 angle probe
- 600 angle probe
- 700 angle probe
Probe is also called as a “search unit” or “scanning device”. The probe is connected with the machine with the help of a connector (connecting wire). The machine has a screen (CRT or LCD) and adjustment/setting keys.
Normal Probe Scanning:
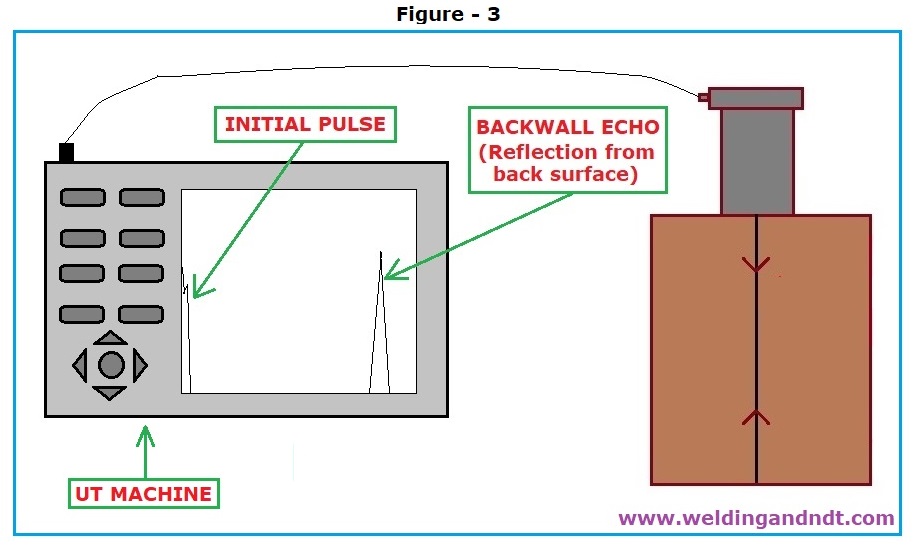
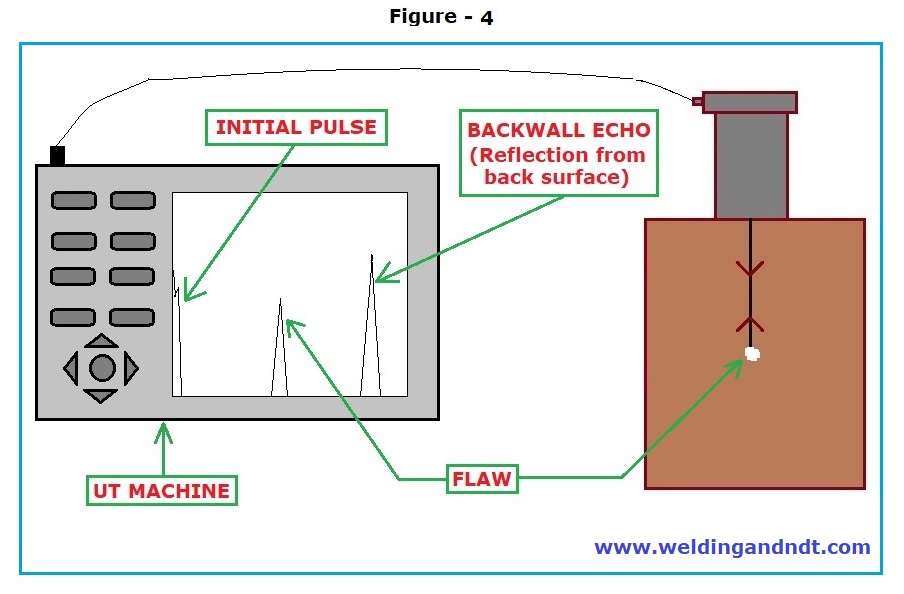
Waves emitted by a normal probe gets reflected at the interfaces or discontinuity (i.e at the change of medium), this is illustrated in figure – 3 and figure – 4. In figure 3, waves gets reflected at the back surface and the resulting echo is known as a Backwall echo. Whereas, in Figure 4 some of the transmitted waves gets reflected at the flaw, hence two echoes are visible in the machine, one is for the flaw and the other one indicates the backwall.
Angle Probe Scanning:
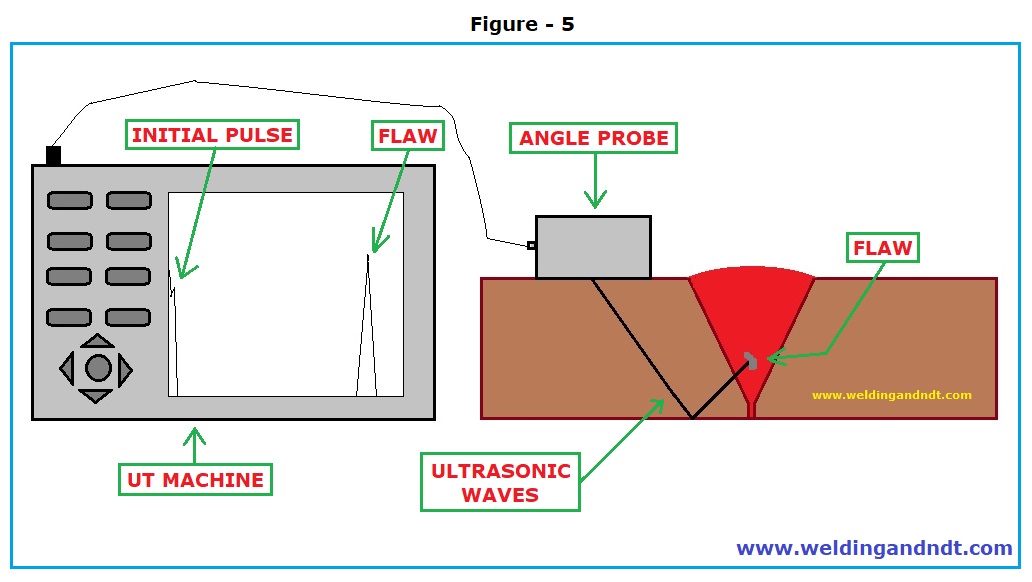
Figure 5 shows an angle probe, Some part of the transmitted waves gets reflected at the flaw and the resulting echo is visible in the machine. To learn more about angle probe scanning please click here.
Modes of propagation of sound energy:
Sound waves are propagated, in a material, by the displacement of successive atoms in that material. These sound waves can be propagated in the material in many ways (modes). Three basic modes of propagation of sound energy in metals are being used in Ultrasonic test, these modes are:
- Longitudinal waves
- Transverse waves
- Surface waves
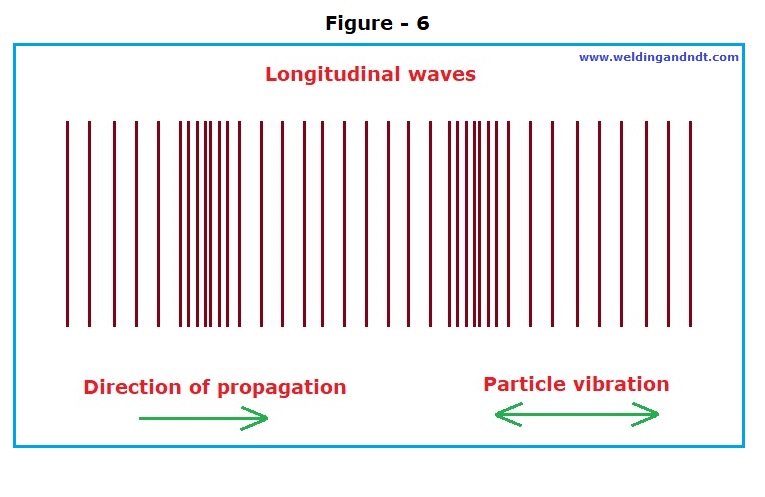
Longitudinal waves: Longitudinal waves (Figure – 6) are also called as straight or compressional waves. These waveforms are the simplest of all other waveforms. These waveforms exist when the motion of the particle is parallel to the direction of sound beam propagation. These waves have a relatively high velocity and a relatively short wavelength. These waveforms are very useful for detection of inclusions and lamellar-type discontinuities in base metal. Normal probe emits longitudinal waves.
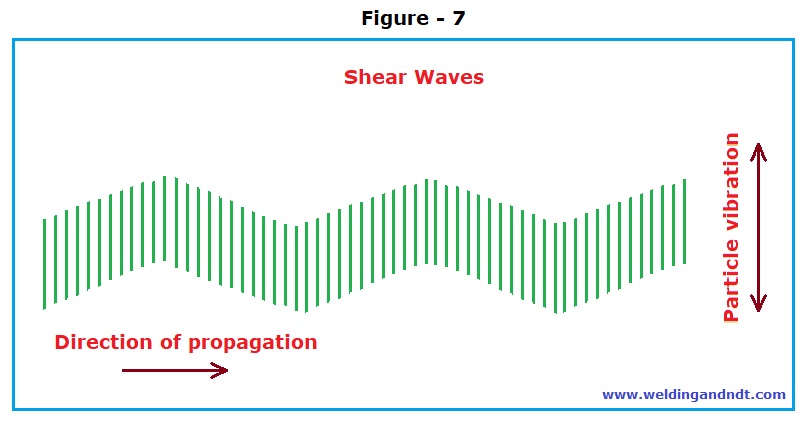
Transverse waves: Transverse waves (Figure – 7) are also known as shear waves. These waveforms exist when the motion of particle is perpendicular to the direction of propagation of the sound beam. The velocity of shear waves is approximately half to that of longitudinal waves. The lower velocities provide greater sensitivity to small indications. These waves are more easily dispersed and cannot be propagated in a liquid medium (water). These waves are very useful for the detection of weld discontinuities.
Shear waves are generated by transmitting longitudinal waves into the work piece at a predefined angle. The sensitivity of transverse waves is approximately double than that of longitudinal waves. Angle probe emits longitudinal waves.
Surface waves: Surface waves is the third mode of propagation of sound energy in metal. It is also known as Rayleigh waves. These waves are propagated along the surface of the metal. Since these waves have very little movement below the surface of a metal hence, these waves have a very limited application for the examination of welded joints.
Wave frequency: The sound wave frequency generally used for weld inspection is between 1 MHz to 6 MHz Higher frequency produce sharp and small sound beam which is very useful for thin-walled weldments. A 2.25 MHz frequency is often used in industries.
Couplant: For transmission of ultrasonic waves into the test object, a liquid couplant is generally used. Most commonly used couplants are water, light oil, glycerine, and cellulose gum powder mixed with water. Work piece must be smooth and flat to allow proper coupling of the transducer with the test specimen.
To read more please click here

thanks dear
could you please add more articles about UT for
calibration
DAC curve for plates and pipes
evaluation and acceptance criteria for Flaws AWS and ASME B31.3
Thanks my friend thanks for your valuable information.
Please add more information articles related UT, RT, MPI, and PT.
Could you please share how to easily refer to code and standards I meen shortcut methods
Why is the reason for ultrasonic test carried out must after pipe cut?Sir please give me answer
for lamination check ,generally ut carried out .
Very good explanation of ultrasonic basics